 Terroir & Table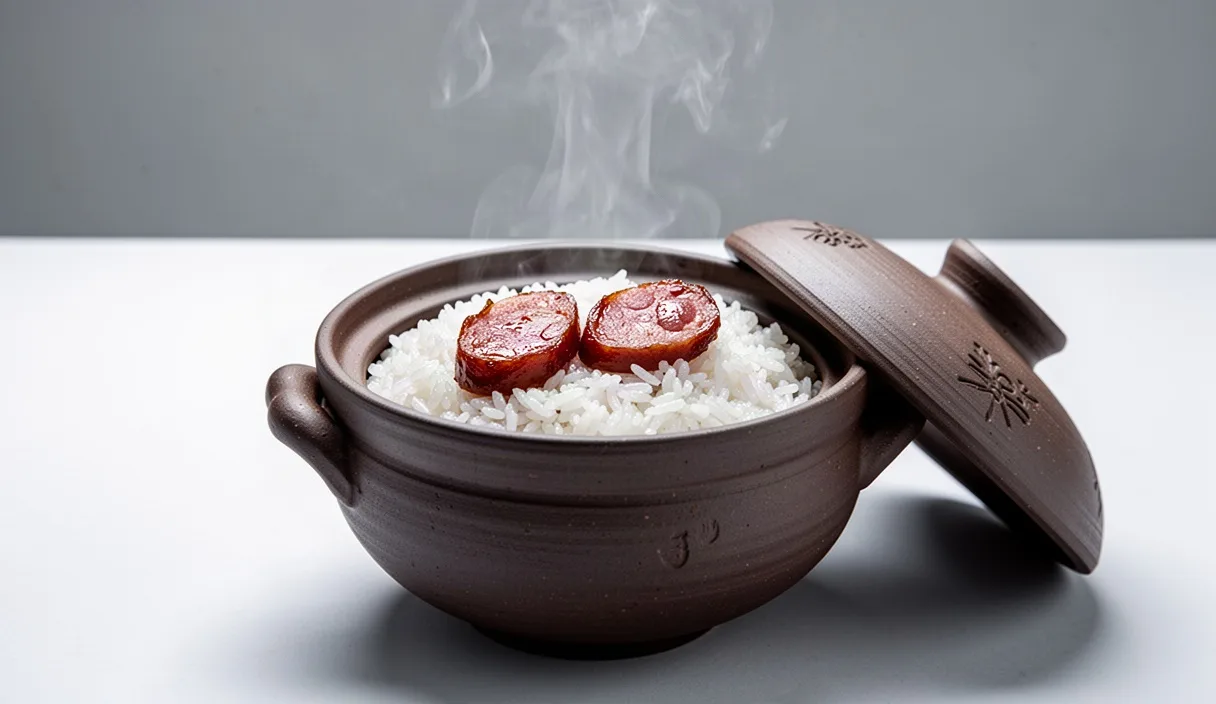

Clay pot rice cookery, known in the Cantonese vernacular as bo zai fan, occupies a revered position within the canon of Southern Chinese culinary traditions. At its core, the dish represents an exercise in thermal balance and starch management, transforming modest grains of rice into an aromatic canvas supporting preserved meats, poultry, or fish. The ultimate measure of a cook's proficiency in this technique is the guoba, often referred to in Cantonese as fan jiao: an amber, contiguous crust of toasted rice that adheres to the bottom and lower slopes of the vessel, yielding a crisp texture without bitterness or charring.
To produce this crust intentionally, rather than by accidental scorching, demands an understanding of heat distribution across unglazed earthenware, precise liquid measurements, and the physical behaviour of rendered fats. Modern domestic burners present distinct challenges compared to the wide, high-volume charcoal braziers traditionally employed in street stalls across Guangdong and Hong Kong. With disciplined execution, a domestic cook can replicate these traditional thermodynamics over a conventional gas flame, coaxing rice grains to release their surface starch, absorb savoury drippings, and fry into a crisp layer of golden crust.
The Mechanics of Cantonese Sand-Clay Cookware
The classic Cantonese vessel, designated as a shaguo or simply bo, is fashioned from coarse stoneware rich in sand. This granular composition serves an essential structural function: the inclusion of quartz sand introduces micro-porosity throughout the clay body. These minute voids act as tiny thermal dampers, slowing the conduction of direct heat from the burner to the food. Consequently, a sand-clay pot absorbs thermal energy gradually, retains it for prolonged intervals, and radiates gentle, far-infrared heat across its interior surface. This radiant quality differs fundamentally from the conductive heat of cast iron or clad stainless steel, which frequently causes localized scorching before the core of the rice bed can cook through.
A distinctive feature of commercial Cantonese clay pots is the exterior binding of galvanized iron wire. This wire armature does not merely serve as ornamentation; it provides radial tension that holds the vessel intact under thermal expansion and contraction. Sand-clay expands at an uneven rate when exposed to uneven flame patterns. The exterior wire harness distributes these localized stresses, mitigating the formation of catastrophic fissures. While unglazed on the exterior to permit rapid breathing of the clay, the interior is typically sealed with a thin, salt-rich or feldspathic glaze that protects the porous wall from becoming saturated with rendered grease, which would otherwise turn rancid over extended storage periods.
Because sand-clay possesses lower tensile strength than refined stoneware, thermal shock represents its primary vulnerability. Subjecting a boiling pot directly to a stone countertop, or exposing a dry, refrigerated vessel to high flame, will induce immediate fracture. Heat must be introduced progressively. Once fully charged with thermal energy, the sand-clay matrix continues to cook the contents even after removal from the heat source, a thermal inertia that the cook must reckon with when timing the final dehydration and frying of the crust.
Rice Selection and Exact Water Absorption Ratios
Achieving the ideal separation of grains and an unbroken crust requires careful selection of long-grain rice. New-crop jasmine rice, prized for its high moisture and delicate floral perfume, proves problematic in clay pot cookery; its excess internal water content yields a sticky, gelatinous starch matrix that collapses into mush before developing a crisp shell. Cooks should instead seek aged long-grain rice, ideally stored between nine and eighteen months post-harvest. As rice ages, its internal moisture drops to roughly twelve percent, while the cell walls firm up, allowing the grain to maintain structural integrity under prolonged thermal pressure.
Rinsing the rice is non-negotiable. Place the dry grains into a fine mesh colander and submerge them in cold water, swirling with a light hand for thirty seconds before draining. Repeat this cycle four to five times until the runoff runs clear. This process removes loose surface amylose, which would otherwise produce a gummy slurry at the bottom of the pot that burns rather than fries. After washing, submerge the grains in cool water for precisely thirty minutes. This step ensures that the core of each grain hydrates before heating commences, preventing hard, chalky centres in the finished dish.
| Rice Variety | Age of Crop | Water-to-Rice Ratio by Weight | Expected Grain Texture |
|---|---|---|---|
| Aged Jasmine (Thai Hom Mali) | 12 to 18 months | 1.15 to 1.00 | Distinct, firm, moderate fragrance |
| Standard Long-Grain | Unspecified commercial | 1.20 to 1.00 | Dry, firm separation, neutral flavour |
| New-Crop Jasmine | Under 6 months | 1.05 to 1.00 | Soft, tender, prone to sticking |
The ratio of water to soaked rice must be calibrated strictly by weight rather than volumetric cups. For thoroughly soaked and drained aged jasmine rice, employ a ratio of 1.15 parts water to 1.00 part soaked rice by weight. If using unsoaked grains, the ratio increases to 1.30 parts water to 1.00 part dry rice. Pour the calculated volume of cold water over the rice directly in the clay pot, ensuring the bed of grains forms a level plane across the base.
Timing the Cured Meat and Protein Layer
The introduction of proteins must be synchronized with the evaporation curve of the cooking water. Laying raw or cured meats across the wet rice at the beginning of the cook causes two structural failures: the heavy proteins sink into the wet grain layer, displacing the starch and disrupting heat circulation, and the juices dilute the surface water, resulting in an unevenly boiled mash. The cook must observe the bubbling behaviour inside the pot through regular, brief inspections.
Bring the rice and water to a vigorous boil over medium-high heat with the lid off, a process that normally takes five to six minutes. As the surface liquid reduces, steam vents will emerge across the rice bed, accompanied by distinct, rapid bubbles resembling what Cantonese cooks call "crab eyes." When the visible water has receded completely beneath the surface of the rice, leaving exposed, shimmering grains with small steam craters, the proteins should be applied across the top.
- Cured Sausages (Lap Cheong and Yun Cheong): Slice diagonally to a thickness of four millimetres, or leave whole if preferred. Place them evenly around the upper surface so their fat renders downward over the entire radius.
- Cured Pork Belly (Lap Yuk): Blanch briefly in boiling water for sixty seconds to strip excess exterior brine, slice thin, and distribute among the sausages.
- Marinated Chicken: Bone-in cuts must be chopped into small, bite-sized pieces, seasoned with light soy sauce, Shaoxing wine, ginger, white pepper, and a touch of cornstarch. Lay the pieces in a single layer without overlapping to ensure thorough steaming within ten to twelve minutes.
Immediately replace the heavy clay lid once the proteins are set in place. Reduce the flame to medium-low. The trapped steam inside the vessel will gently cook the chicken and soften the preserved meats, causing their fats to liquefy and percolate downward through the rice column, naturally seasoning each grain on its descent toward the clay floor.
The Rim-Tilting Method for Perimeter Heat
Domestic gas burners concentrate thermal energy in a tight ring beneath the central core of the vessel. If left stationary, the clay pot will develop a burnt, carbonized spot at its bottom centre, while the perimeter rice remains pale, soft, and moist. To produce a continuous, bowl-shaped crust that climbs several centimetres up the internal walls, the cook must utilize the rim-tilting method, shifting the vessel off-centre in regular rotational intervals.
After the proteins have steamed for eight minutes and the liquid has fully evaporated from the pot, lower the heat slightly and tilt the vessel at an angle of roughly thirty degrees relative to the burner grate. Use an oven mitt or heavy folded towel to hold the pot handle firmly. The flame should lick the lower flank of the pot rather than its base. Maintain this angle for two to three minutes before rotating the vessel ninety degrees to expose the next quadrant. Repeat this process until all four quadrants have received direct, concentrated thermal contact.
- Angle the pot toward the north quadrant, directing flame along the rear wall for two and a half minutes.
- Rotate ninety degrees clockwise to the east quadrant, holding for two and a half minutes.
- Rotate to the south quadrant, heating the front wall for two and a half minutes.
- Rotate to the west quadrant, completing the perimeter exposure for two and a half minutes.
- Return the vessel to a level, central position over very low heat for a final two minutes to set the bottom floor.
Throughout this procedure, listen closely to the acoustic signatures within the pot. The soft, bubbling hiss of evaporating moisture will gradually transition into a rhythmic, dry crackle, similar to small twigs breaking underfoot. This sound indicates that free water has evacuated the bottom layer, and the grains are beginning to toast directly against the heated clay.
Deploying Fat for the Crispy Guoba Base
While cured meats release an appreciable quantity of fat, this rendering is rarely sufficient on its own to form an unbroken, glossy crust that releases cleanly from the clay. An external fat source must be deliberately introduced along the internal perimeter during the final stages of cooking. Pure rendered pork lard remains the traditional and superior choice for its high smoke point and deep savoury notes; clarified chicken fat or neutral peanut oil can serve as functional alternatives.
During the rim-tilting sequence, gently unseat the lid by a centimetre or two, or use a small metal spoon to trickle approximately one tablespoon of lard directly along the exterior crevice where the lid meets the pot rim. The liquefied fat will run down the hot interior walls beneath the lid via capillary action. As the fat courses down the sides, it slips beneath the edges of the rice cake, forming a continuous lubricating film between the starch and the clay floor.
Once the fat makes contact with the base, the acoustic rhythm inside changes noticeably. The crackle becomes sharp and brisk, signaling that the rice is now shallow-frying rather than merely baking. If a thin, white wisp of fragrant smoke appears from the steam hole in the lid, the crust is browning correctly. If the smoke turns dense, dark, or smells sharply acrid, immediately cut the flame, as the fat is exceeding its thermal tolerance and the rice is beginning to char.
Maintenance and Cleaning of Sand-Clay Pots
The longevity and structural integrity of a sand-clay pot depend upon proper tempering before its inaugural use, as well as disciplined post-cook care. A brand-new pot should never be placed dry upon an open flame. Submerge the entire pot and lid in cold water for twenty-four hours to saturate the clay matrix. Following this soak, dry the vessel with a cloth, fill it with water and a handful of broken rice, and simmer gently over low heat for an hour to yield a loose congee. The microscopic starch molecules penetrate the pores of the earthenware, sealing structural micro-cracks and establishing a smooth internal finish.
Cleaning must be performed with mild interventions. Allow the vessel to cool completely to ambient room temperature before exposing it to water; pouring cold water into a hot sand-clay pot will cause immediate structural cracking due to thermal shock. Once the pot is cool, soak the interior with warm tap water for twenty minutes to soften any tightly adhering rice remnants. Avoid synthetic dish soaps or aggressive chemical detergents, as the porous, unglazed exterior will absorb these compounds, releasing unpleasant soapy odours into subsequent dishes.
Scrub the glazed interior using a natural palm-fibre brush, a soft tawashi, or the coarse side of a non-abrasive sponge. Should stubborn, scorched starch remain bonded to the floor, fill the pot with warm water, stir in two tablespoons of sodium bicarbonate, and let it stand overnight before wiping it clean. Dry the vessel thoroughly with a towel, then invert it on a well-ventilated wire drying rack for at least forty-eight hours prior to storage. Storing an earthenware pot while residual moisture lingers inside its clay walls will lead inevitably to mildew growth within the enclosed dark space of a kitchen pantry.
Common Mistakes in Clay Pot Cookery
Even seasoned hearth cooks encounter specific pitfalls when working with earthenware. Recognizing these early prevents wasted ingredients and ruined cookware.
- Premature and Repeated Lid Removal: Lifting the lid repeatedly during the initial boil and reduction dissipates internal steam pressure, dropping the temperature and resulting in undercooked, chalky rice cores.
- Applying Rapid Heat Adjustments: Turning a cold burner instantly to high beneath a cold pot creates uneven expansion stresses that split the base along its perimeter wire. Always warm the pot over low flame for two minutes before increasing heat.
- Adding Cold Protein Directly from the Chiller: Introducing refrigerator-cold chicken or pork lowers the temperature of the rice surface instantly, creating condensation that turns the top layer gummy while the base burns. Bring all meats to room temperature twenty minutes before cooking.
- Neglecting the Rest Period: Removing the pot from the flame and serving immediately will make crust extraction difficult. Leaving the lid undisturbed for seven to ten minutes off the heat allows moisture to redistribute slightly, enabling the crispy shell to contract and detach cleanly from the clay.
Practical Steps for the Next Hearth Session
To put these principles into practice, begin by inspecting your sand-clay pot for structural soundness. Verify that the exterior wire binding remains taut, and examine the base for any deep stress fractures that may have formed during storage. If the vessel has remained idle for several months, immerse its base in cold water for twenty minutes before placing it on the range to rehydrate the clay pores.
Next, assemble your mise en place before lighting the flame. Weigh both the aged long-grain rice and the water accurately using a gram scale, pre-slice your cured sausages into four-millimetre rounds, and measure your rendered lard into an accessible pouring vessel. Because the rim-tilting sequence requires continuous presence and sharp sensory attention, having your proteins, timers, and fats arranged beside the burner ensures you will not leave the flame unattended at the critical juncture where soft rice transitions into golden, toasted perfection.